To create new system service on the remote PC, follow these instructions:
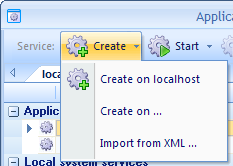
1. Click “Create” button on Toolbar. Choose “Create on…” option:

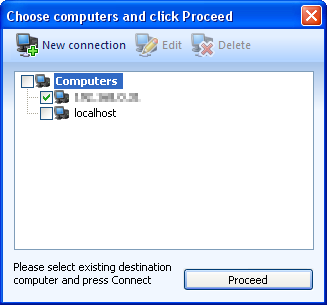
In the invoked window check the box next to the PC on which you want to create a service. You can select several remote PCs at a time.

If there is no required computer on the list, add it by clicking “New connection” button. Refer to Connect to Remote PC and Manage Services section for details.
Once the remote PC is selected, click “Proceed” button.
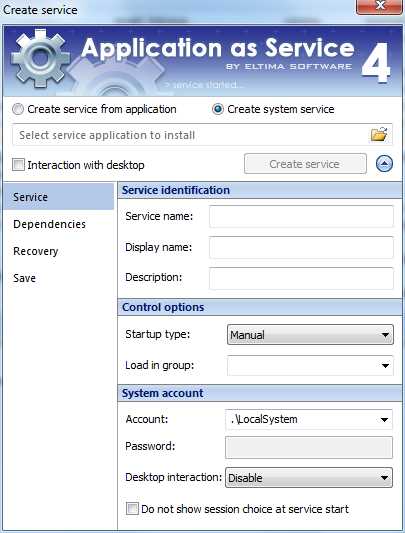
2. “Create service” window will be invoked.

3. Now choose one of the following options:
- Create service from application – The main benefit of this option is that you can supply your application with advanced features: choose the user session to start the service in, schedule the service launch, manage its pop-up windows, log error streams, and many others. This option is preferred if you want to run as service an application with UI.
- Create system service – In contrast to the first option, “Create system service” option provides fewer possibilities for running application as service. The service control and management in this case will be carried out by the system. Choose this option if you want your service take less CPU resources when running.Please, take into account that to work correctly, your application should satisfy the requirements of the service control manager (SCM). You can find more info on Service Programs at http://msdn.microsoft.com/en-us/library/ms685967%28v=VS.85%29.aspx
4. Select the service you want to install.
The path to the service on the local machine should coincide with the one on the remote machine. Navigate to the needed application using ![]() button. If the application does not exist on the local machine, but exists on the remote one, you should know its path in order to specify it manually.
button. If the application does not exist on the local machine, but exists on the remote one, you should know its path in order to specify it manually.
5. Enable “Interaction with desktop” option if you want your application’s UI be visible. Otherwise, your application will run in the background. Read ‘Start Services Interactively‘ section for more instructions.
6. Configure settings using different tabs. Full description of these tabs is available in ‘Configuration Tabs‘ section.
7. Once all the available settings are configured, click “Create service” button.
8. Once successfully created, your new service will appear in Services list.
9. Read how to manage the services remotely using Toolbar buttons in ‘Connect to Remote PC and Manage Services‘ section.
Notes:
- If you haven’t specified “Automatic” startup type in Service tab (the default value is “Manual”), the service won’t be started until you do it intentionally. To start the service, select it in Services list and press “Start” button on Toolbar. Once the service is started, its status will change to “running”.
- If you experience problems with creating new system service on the remote computer, make sure you’ve read the following sections in our Knowledge Base:
Using Application as Service with Windows Firewall
Configuring the UAC (User Account Control) settings to allow remote connections