To create a connection, follow these instructions:
1. Switch to "Create connection" tab.
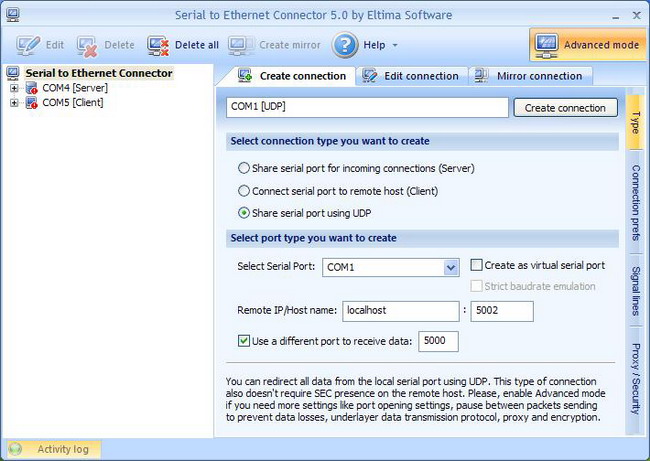
3. Select connection type you want to create. In this case it is "Share serial port using UDP".
4. In "Select Serial Port" field choose local serial port which will participate in connection: either add it manually, or select one from the drop-down list.
5. Tick "Create as virtual serial port" option if you would like to use virtual serial ports instead of real ones.
6. Tick "Strict baudrate emulation" checkbox if you want to enable baudrate emulation. You can find more details about our virtual serial port and baudrate emulation technologies here.
7. Specify IP address (or network name) of the remote end and port number to connect to. Make sure that the port numbers are the same at both ends and are not blocked by firewall.
8. You can also specify the port to receive the data, regardless of the port the data is sent to. It may be useful if you create UDP connection with several devices that have the same ports.
9. Finally, click "Create connection" button. Once connection is created, you can see it in Connections tree.
10. Open local serial port. You may use Windows HyperTerminal utility for this purpose. This step is necessary only if you want to verify whether the connection was created successfully.
11. Create UDP connection at the remote end. Repeat steps 1-10 listed above. Make sure that the port numbers are the same at both ends and are not blocked by firewall.
12. Now you are ready to start communication process with default settings. You can refer to Editing UDP connection section if you would like to edit a newly established connection.
13. Alternatively, you can use Mirror connection option to automatically configure the remote end.
14. Setting up connection settings section will help you change advanced settings after activating Advanced mode.